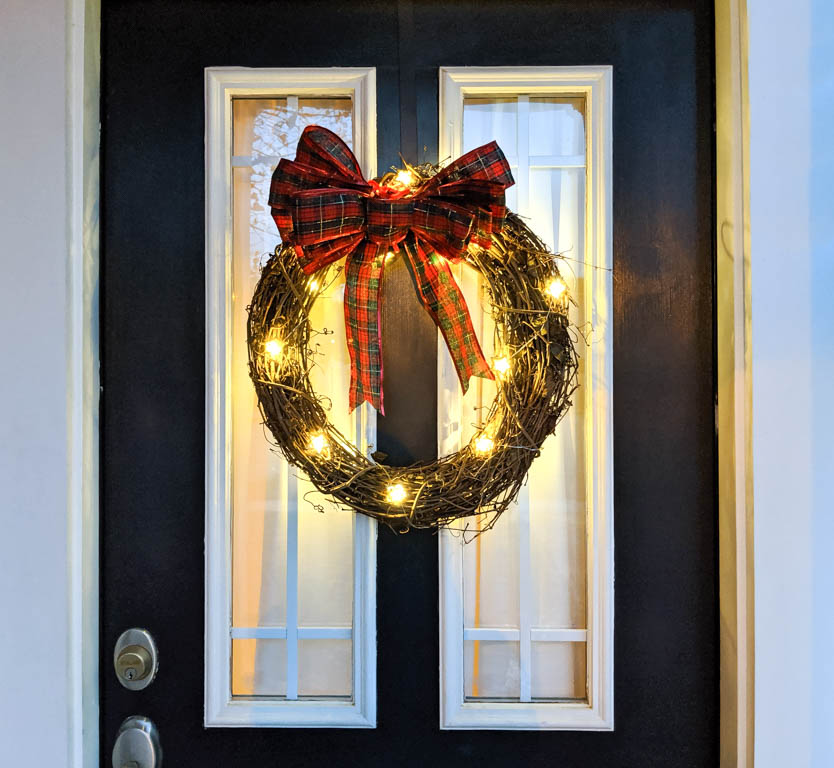
One of the things that I think makes Christmas so magical is all the fun lights that people put up. I love lights in all shapes and sizes and I thought it would be a fun idea to implement some lights into a wreath. So here is the Christmas light wreath that I put together.

It’s simple, looks nice, but has a fun twist when day turns to night. The stars you see on the wreath are the lights. Something that is really nice about using battery powered LEDs is that you can get LED lights that have a timer so you can just switch it on when you want and it turns itself off 6 hours later. You won’t have to touch it again. I love that convenience! Here’s how to make the Christmas light wreath.
*This post contains affiliate links.

Supplies for Christmas Light Wreath
For more Christmas crafts, be sure to check out these candy cane ornaments, my mermaid tail stocking, or these fun winter themed ornaments.
Attaching the Christmas Lights to the Wreath
Take the battery pack of the Christmas lights and attach it to the grapevine wreath using two pipe cleaners. Just thread the pipe cleaners through the vines and twist them on. I put my battery pack on the inside of the wreath and hid it under the bow. However, you can also attach it to the backside if you prefer.


Make sure the battery pack is a bit off center so you have room for the wreath hook. You’ll also want to make sure that you attach it with the switch facing away from the wreath so you can turn the lights on and off. If you have excess wire before the lights start, twist that in the pipe cleaners as well.
Wrap the Christmas lights all the way around the grapevine wreath. Once you reach the end, tuck the last bit of the light strand into the grapevines. If you need to, you can secure it with a pipe cleaner.


Making the Wreath Bow
Take the ribbon and make a small loop. (about 2 inches.)

Hold that loop in your fingers and measure out 5 more inches of ribbon. Fold it over so it meets the first loop.

Repeat on the other side of the initial loop. You’ll now have 3 loops. One small one and one big one on each side of the small one. Stack the ribbon by making two more loops (one on each side) five inches long. Then four more loops (two on each side) 5.5 Inches long. And finally another four loops (two on each side) 6 inches long. You should now have six loops on both sides of the bow. It should look something like this.

Take a pipe cleaner and put it through the initial two inch loop you made. Secure all the loops by twisting the pipe cleaner around their center.


Take the remaining ribbon from the spool and make an extra large loop and twist the end of it onto the pipe cleaner of the bow. My loop was about 20 inches long, but you can make it however long you want. This loop will become your tails so keep that in mind when measuring it out. Snip the ribbon from the spool to disconnect it.


Cut the long loop in the very center to create the tails.

Measure the tails to be the length you want. My tails were approximately ten inches long. Fold one bow tail in half and cut at an angle. Repeat on the other tail.


Fluff up the bow by pulling the loops away from each other.

Attaching the Bow to the Wreath
Attach the bow to the grapevine wreath using the bow’s pipe cleaner. You’ll want to make sure you put the bow centered on the wreath, but still enough over the battery pack to hide it under the bow. If you’re not satisfied with your bow, continue fluffing it until you like how it looks.


The Christmas light wreath is now done a ready to be hung up! I really enjoyed making my Christmas Light Wreath and I hope you enjoy making one too. Thank you so much for reading and have a merry Christmas!
