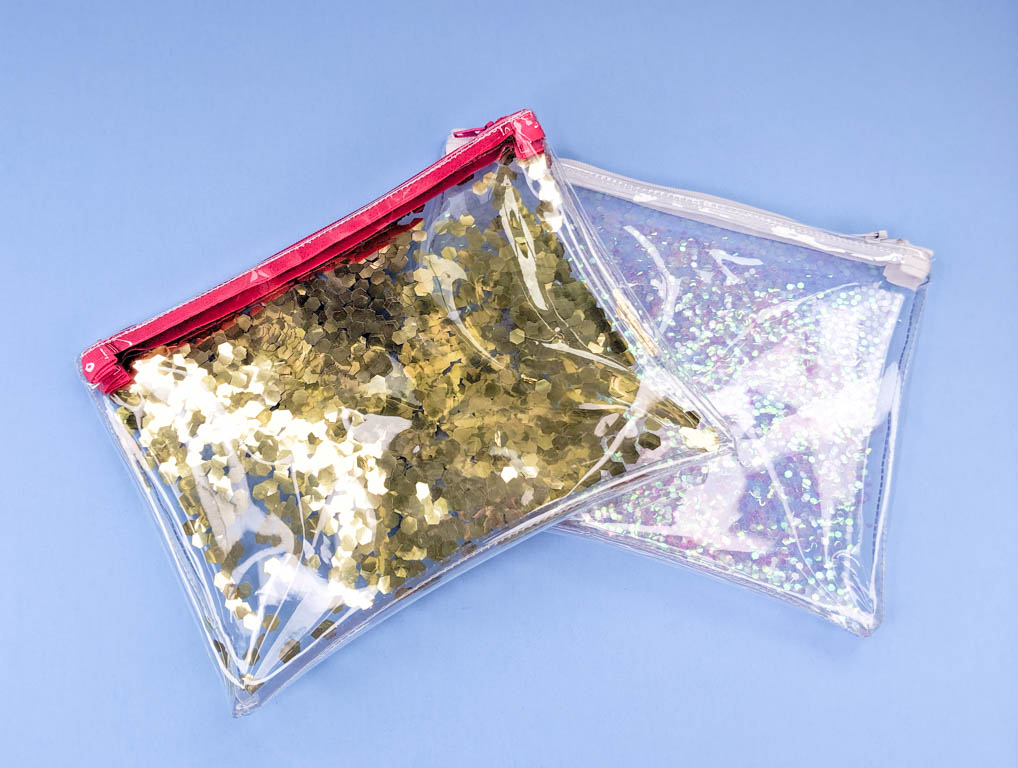
I recently made a clear bag filled with lot’s of glitter that doesn’t get all over my stuff. It’s fun and I’ve created a pattern for it so we can all have one!
I used clear vinyl for this project. It was found in the upholstery fabrics at a hobby lobby, and most fabric/craft stores should have some form of clear vinyl. The vinyl I used was labeled as “couch cover” vinyl.
This is an intermediate project because the vinyl can be sticky on the machine and it’s a little more bulky which makes it difficult to work with.
This post contains affiliate links
Things to Know Before You Sew
I recommend using a denim needle for this project because it’s a bit more sturdy and won’t bend or break as easily as a regular needle would on the vinyl.
Cut a few small strips of tissue paper to feed through the sewing machine with the vinyl. It will help the vinyl not stick to your sewing machine and presser foot as much.
Don’t use pins. The holes in vinyl are very permanent! Instead, use quilting clips or binder clips. You could even use clothes pins if you have them on hand.

Supplies for Glitter Zipper Bag
- Clear vinyl (1/2 yard)
- 9″ Zipper
- Glitter
- 1.5″ Wide ribbon to match zipper color (You could also use scrap fabric here)
- Thread
- Tissue paper (optional)
Looking for more fun sewing patterns? Check out these awesome scrunchies, or these fun heart pillows.
Get the Pattern Here
To get the free pattern, click on the pink button above.
*This pattern is for personal and commercial use (up to 50 times) only.
**Don’t like the ads? Get the ad free version of this glitter bag pattern and tutorial in my Etsy shop.
Zipper Prep
Cut out the bag and ribbon pieces. You should have three pieces for the bag and two pieces for the ribbon (the ribbon is the zipper tabs).
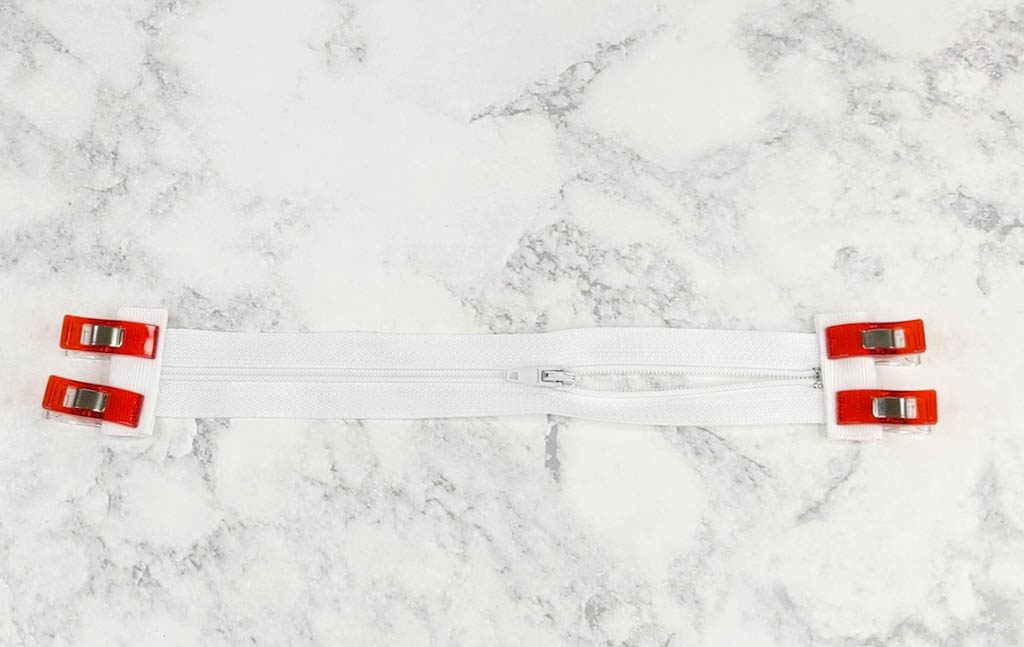
Take the ribbon (zipper tab) pieces and fold both of the raw ends in towards the center 1/4″ and iron down. keeping the raw ends in the center, fold the ribbon in half and iron again.


Take the zipper and measure the end of it down to 1/4″ from the metal stop. Snip the end of the zipper off so you are left with that 1/4″ over hang.


On the front side of the zipper, use your folded ribbon to measure from where the zipper teeth stop to the end of the ribbon. Snip off the excess zipper end to match the size of the ribbon.


Take one of the zipper tab pieces and sandwich the zipper end between the fold of the ribbon. Clamp in place with your clips and repeat with the other side of the zipper. The ribbon on the back side of the zipper tail will cover the metal stop. The ribbon on the front side of the zipper tail will meet the little metal stops.

Sewing the Zipper Tabs
Edge stitch the zipper tabs onto the zipper tails. I suggest using the hand wheel on your machine for going over the zipper teeth on the back side of the zipper. Go nice and slow to protect your needle.


Zipper Bag Assembly
Lay your zipper down right side up and put one sheet of vinyl on top of it covering the zipper completely. Line up the edges leaving 1/4″ over hang on each end of the zipper. If you are using it, line up the tissue paper on top of the vinyl and zipper. Clamp them all in place and take it to your machine.


Sewing the Zipper Bag
Sew the vinyl to the zipper using a zipper foot. Get as close the teeth as you can without sewing through them. Then tear the tissue paper away from your seam.


Fold the vinyl back to reveal the zipper. Finger press the vinyl down and top stitch in place. Remember to place the tissue paper on top of the vinyl if you are using it.


Put the remaining two pieces of vinyl together and treat them as one piece. On the other side of the zipper repeat the previous steps to add the remaining two pieces of vinyl.
Unzip the Zipper all the way.

Fold the bag in half right sides together with the zipper at the top so that all three layers of vinyl stack on top of each other. Clamp the edges in place leaving half of one side unclamped.

Sew around one side of the vinyl bag, the bottom, and half way up the other side. Don’t sew through the zipper tabs. Pull the bag off of the machine leaving half of one side unsewn.

Open the layers of the bag and find the side that has the two layers stacked. (Between these layers will not be accessible by the zipper.) Pour glitter into this opening. You can pour as much glitter as you want, but keep in mind a little glitter goes a long way.

Finishing the Zipper Bag
Take the bag back to the sewing machine, being careful not to spill the glitter. Sew the remaining side of the vinyl to seal the bag and enclose the glitter.


Trim the seams down to about 1/8″. Be very carful to not cut through your stitches. Clip the corners off the bottom of the bag. Again being carful not to cut through the stitching.


Turn the bag right side out and you’re done! The vinyl will stick to itself while turning so be prepared for that. If the corners get a little stuck use a pen or some other blunt edge to help push it through. Be carful not to stretch the vinyl while turning the corners. If it’s stretched out it will stay that way.


Thank you so much for reading! I hope you’ve enjoyed this tutorial!
