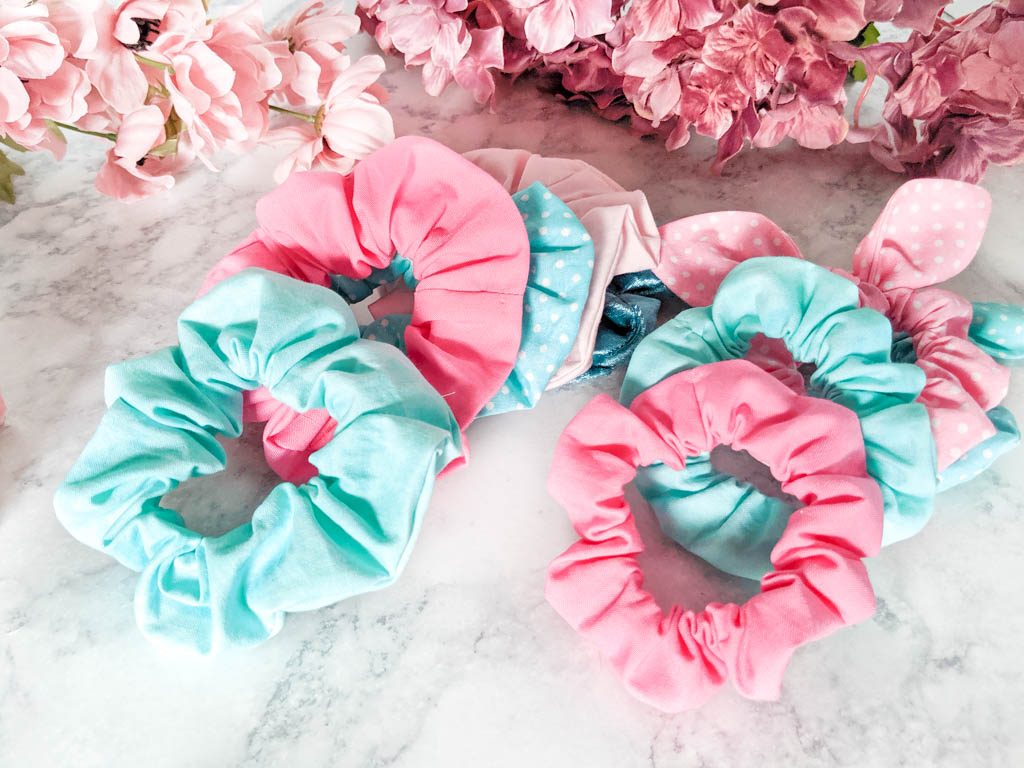
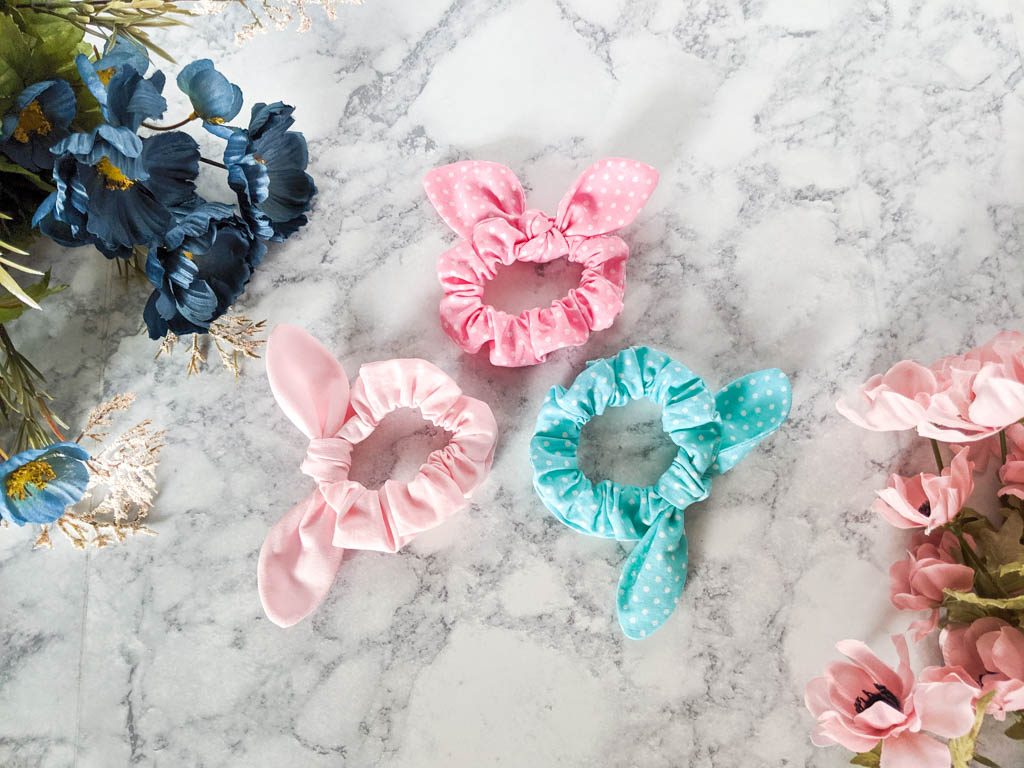
Make scrunchies with a bow
You know how scrunchies have made a massive comeback? These fun retro hair bands have become super popular again, but also cost a small fortune at the stores. If you know the basics of how to use a sewing machine, you can easily make your own scrunchies at home and save some money! Something fun about making your own hair accessories is that you can customize them with any fabric print you want.
Below you will find a free PDF pattern and SVG so you can DIY your own scrunchies. There is even an option for a bow included in the pattern! These are pretty easy and make for a good beginner project. There is even a video to help you through the steps if you get stuck or confused. This is also a great introductory sewing project for teenagers. They learn a new skill and get a trendy hair accessory in the process.
*This post contains affiliate links
This scrunchie pattern has two sizes. There is a small and a large option. The bow is the same for both sizes.

Supplies For Scrunchies
- Fabric
- 1/4″ elastic (1/2″ elastic can be used in larger scrunchie size.)
- Scissors
- Thread
- Turning tool (Optional)
- Safety pin
- Fabric glue (Optional)
Get the Pattern for Scrunchies Here
Click the pink button above to download the scrunchie pattern for free.
Don’t like the ads? Get an ad free printable version of this scrunchie tutorial and pattern in my Etsy shop.
This pattern comes as a PDF so you can print it, then cut it out. It also comes as an SVG so you can cut it in a cricut machine. If you cut it with a cricut, you will need a 24″ fabric mat and the rotary blade. There are two scrunchie pieces in the SVG (two sizes), you only need one for each size. Delete or hide the size you don’t plan on making before sending it to cut.
*This pattern is for personal and commercial (up to 50 times) use only.

If you’re looking for more cute DIY hair accessories, Check out these stacked hair bows!
Fabric Requirements for Scrunchies
You can make these scrunchies with larger fabric scraps. If you are purchasing from a bolt, you’ll want 1/4 yard of fabric. They can also be made using a fat quarter of fabric. (18″ X 21″).
Fabric type will depend on preference. You can use cotton, velvet, or a more stable knit such as liverpool, cotton/lycra, ponte, etc. Most fabric types will work as long a they aren’t too stretchy or too slinky.

Here is the video tutorial to help you through each step.
Sewing Prep
Pre wash and iron your fabric before cutting. Once that is done you can use the pattern pieces to cut out your fabric or send it to cut in the cricut with the SVG. Cut a piece of elastic that measures 8.5″ long. After you have everything cut out you should have one piece of elastic, one scrunchie piece and two bow pieces. (If you’re using the bow.)
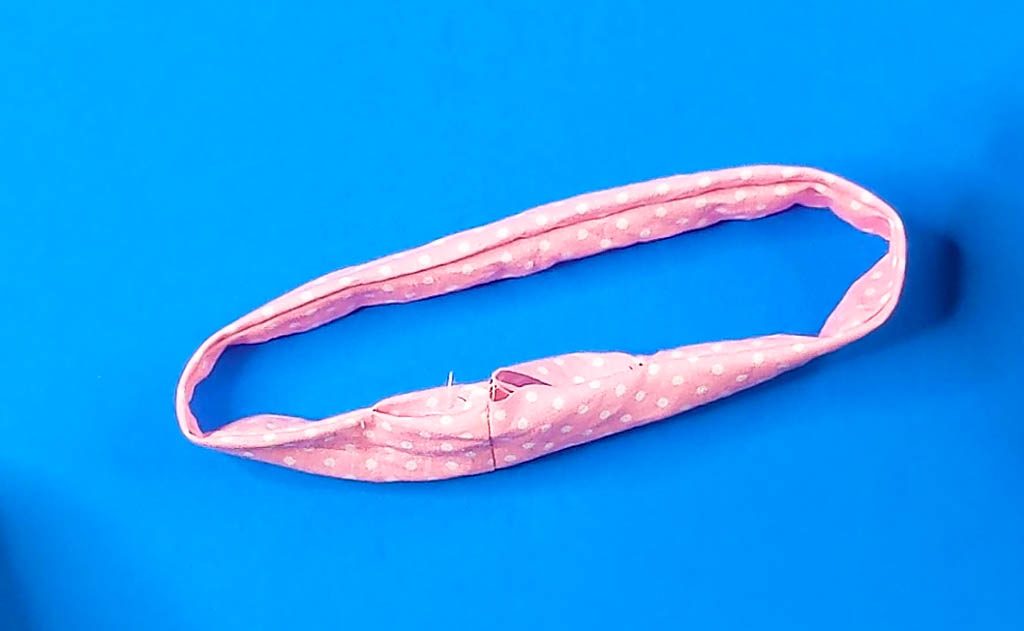
Sewing the Scrunchie
Take your scrunchie piece and fold it in half long ways with right sides together. Pin it in place.


Sew the pinned scrunchie with a quarter of an inch seam allowance. Start your seam an inch down from the top and end your seam an inch before the bottom. You should have one inch on each side that is not sewn.

Take your scrunchie piece and turn it inside itself with right sides together. Pull it half way through to the other side until the raw edges of the short ends meet. Don’t pull it all the way through. You can do this step with a loop turner or a safety pin.

Once you have it halfway turned, matchup the raw edges of the short ends. Pin them together and sew with a quarter of an inch seam allowance.


Finish turning the tube by pulling all the fabric out from the center. Now you’ll have a loop.

Adding the Elastic
Attach a safety pin to the elastic. Now thread it all the way through the scrunchie tube. Make sure you hold on to the tale of the elastic so you can attach the ends after you thread it.


Now you can layer the elastic one side on top of the other with a half an inch overlap and sew it with a zig-zag stitch. Or you can tie the elastic in a double knot. Make sure it’s a very tight knot.


Put the elastic down inside the scrunchy and fold the rest of the seam allowance inside.

You can either seal this opening with fabric glue so it has no seam line or you can take it to your sewing machine and edge stitch down the outside.


If you are not using the bow piece, the scrunchie is finished! If you are using the bow piece, continue to the next step.
Making the Scrunchie Bow
Stack your bow pieces one on top of the other with right sides together. Lineup raw edges and pin together.


Leaving about a two to three inch opening, sew all around the edges of the stacked bow pieces. You’ll need the opening in order to turn the bow right side out.

Trim the seam allowance down to about 1/8″ all the way around the bow except for where the opening is.

Turn the bow right side out. If you’re having a hard time getting the ends to turn all the way, you can use a pen to help push it through. Make sure you do it gently so that you don’t tear through your fabric. Iron the bow so it keeps its shape.

Close the opening with some fabric glue or take it to your machine and edge stitch it closed.


If you’re using the fabric glue, Make sure everything is fully dry before doing the next step.
Tie the bow piece onto the scrunchie in a single knot. You can place it over your seam allowance to hide it if you want.

The scrunchie is now finished! These are perfect for everyday wear, gift giving, or even craft fairs. Thank you so much for reading and I hope you get good use out of this free scrunchie pattern and have fun sewing!
