This post was sponsored by Stylish Fabric. As always, all thoughts, opinions and text are my own.
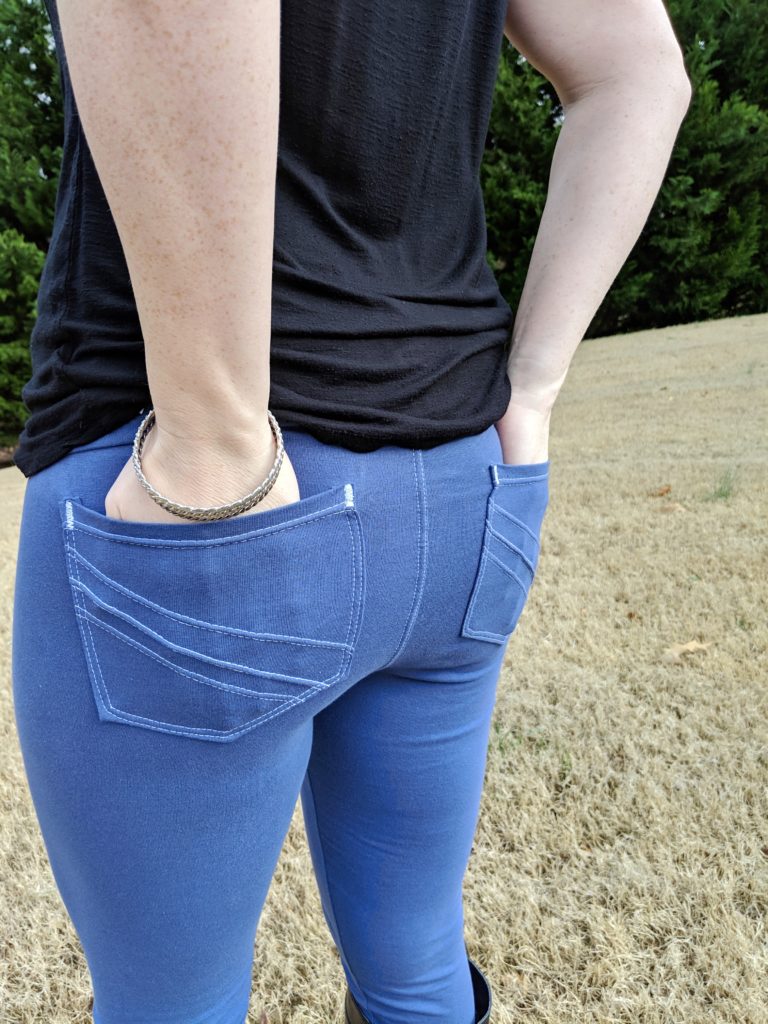
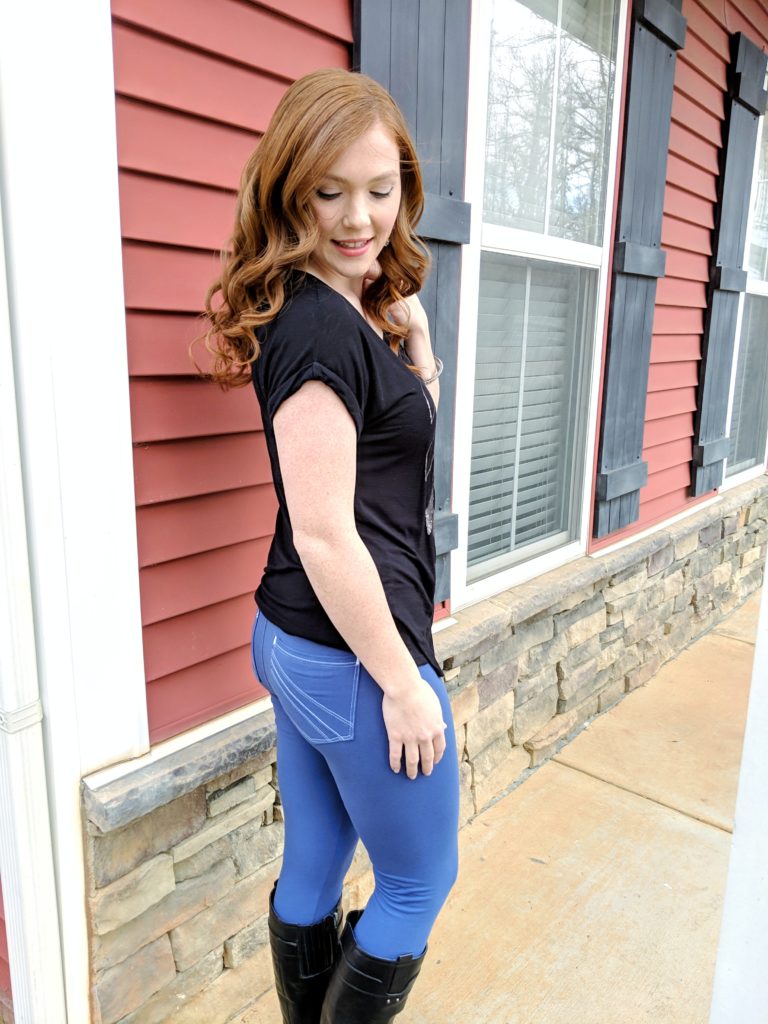
Leggings have become quite popular over the past few years. So much so that they have become a closet staple for lots of women. They are very comfortable and can be quite stylish, but they have one major flaw. They don’t usually have pockets. Without a pocket, where do you put your phone?! Sure you can get some athletic leggings with a pocket on the side of the leg, but those are harder to pair with a cute tunic and not feel like you’re heading to the gym. I know I’m not the only one who struggles with this so to help solve this problem, I sat down and figured out how to put back pockets on leggings. I wrote this tutorial on it so that you can do it too!
I am using the Patterns for Pirates Peg Leg leggings for this tutorial. you can get a free copy of it here. I’m also using a cotton lycra fabric since it has the proper stretch for leggings.
Keep in mind this pattern calls for a stretch fabric which means you should be using a stretch stitch, a zig zag stitch, a twin needle, or a serger for construction. I also highly recommend using a walking foot if using a sewing machine.
For more sewing hacks and pattern hacks, check out this alternate method for sewing cuffs, this cute nightgown pattern mash, or this awesome tutorial for adding drawstrings into a side seam.
Make a Pattern Piece
First you want to make your back pocket pattern piece. If you already own a sewing pattern for pants, it might make sense to use the back pocket piece from that pattern. However, if you don’t own one, you’ll want to get a piece of tissue paper or printing paper, a pencil, and a pair of ready to wear jeans that you feel flatter your body. You will also use a ruler in a later step and scissors for cutting out your pattern piece.
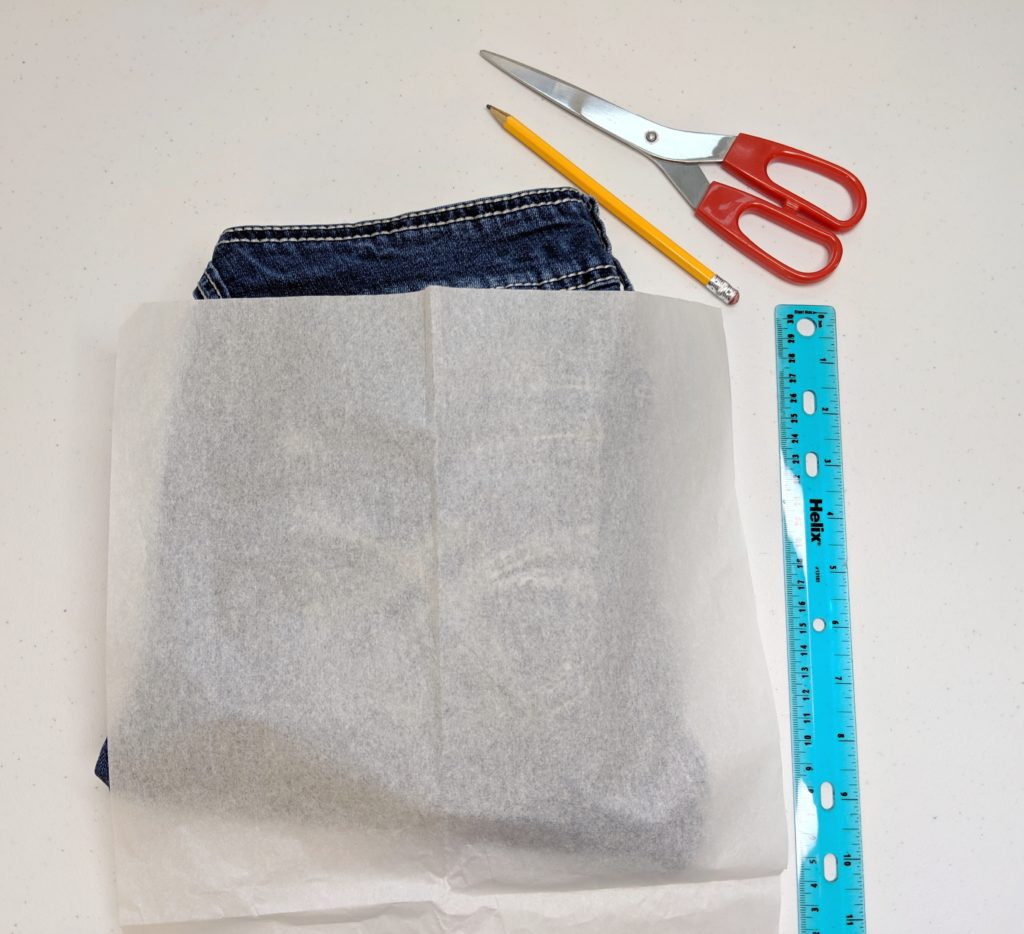
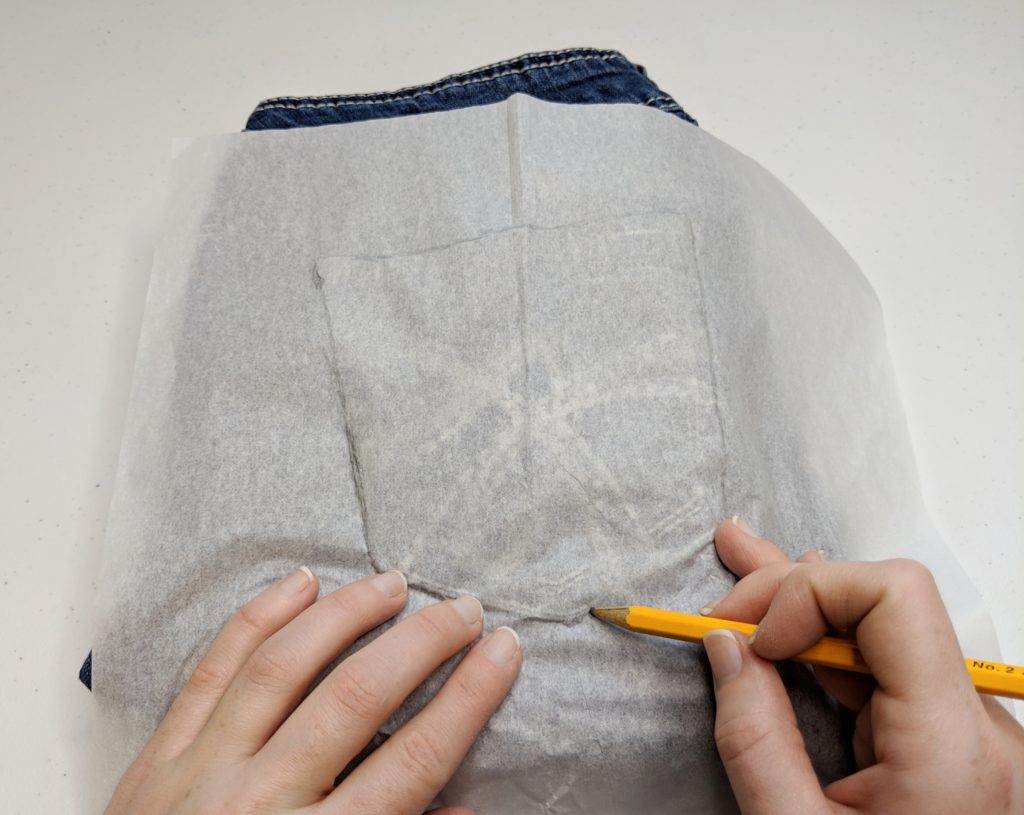
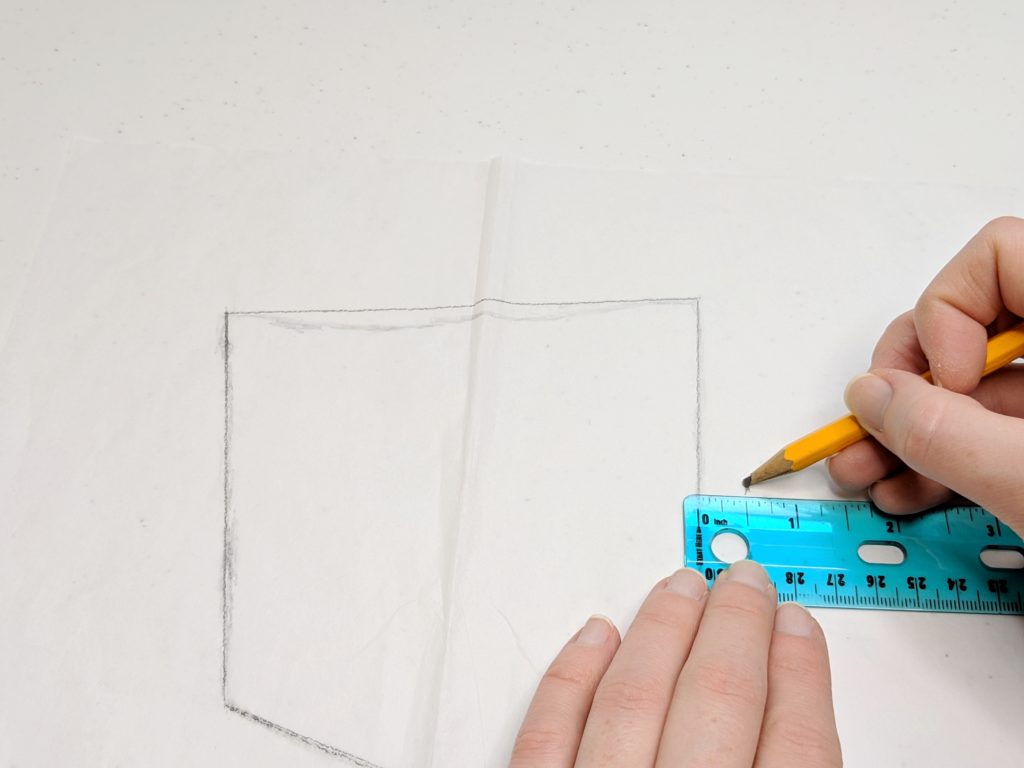
Lay your jeans down with the back pockets face up and trace your back pocket onto your paper. I recommend tissue paper over printing paper because it’s easier to see the pocket through it, but either will work.
Once your pocket is traced, take a ruler and straighten out the traced lines.
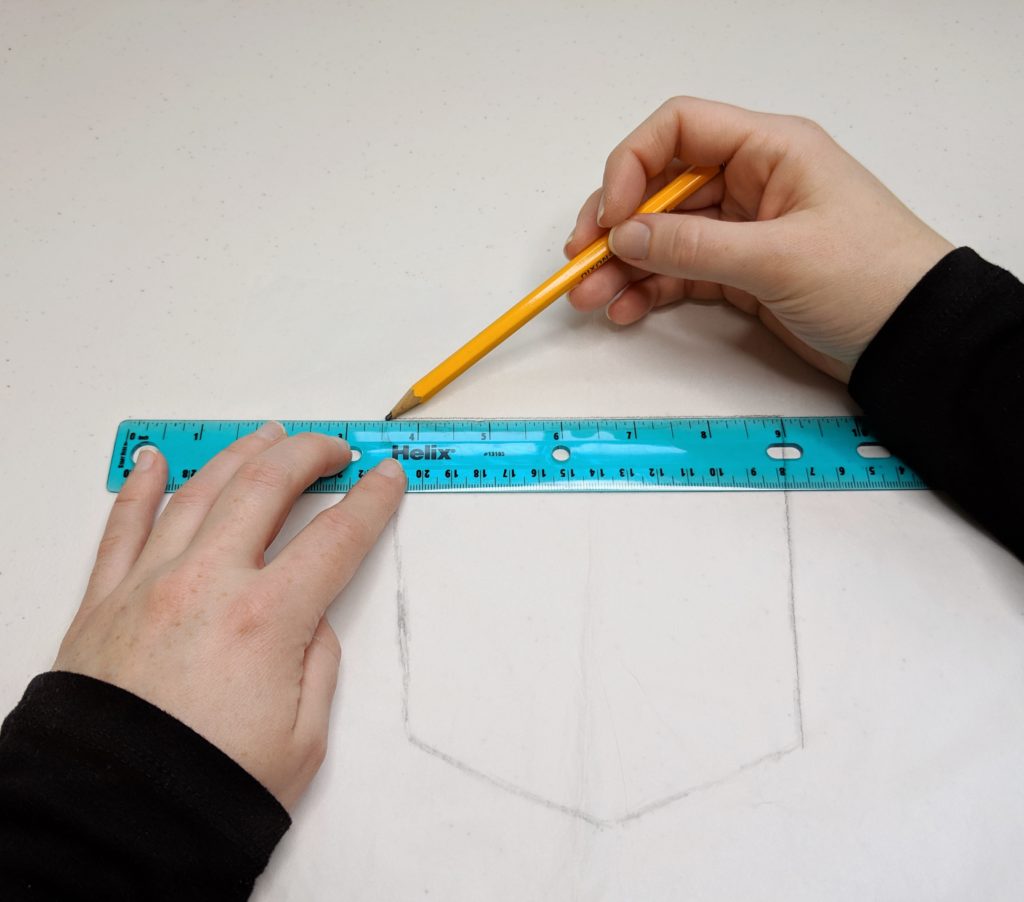
After that you’ll want to add a seam allowance. Since the leggings pattern I used calls for one half an inch seam allowance, that is what I used for my back pocket pattern piece as well.
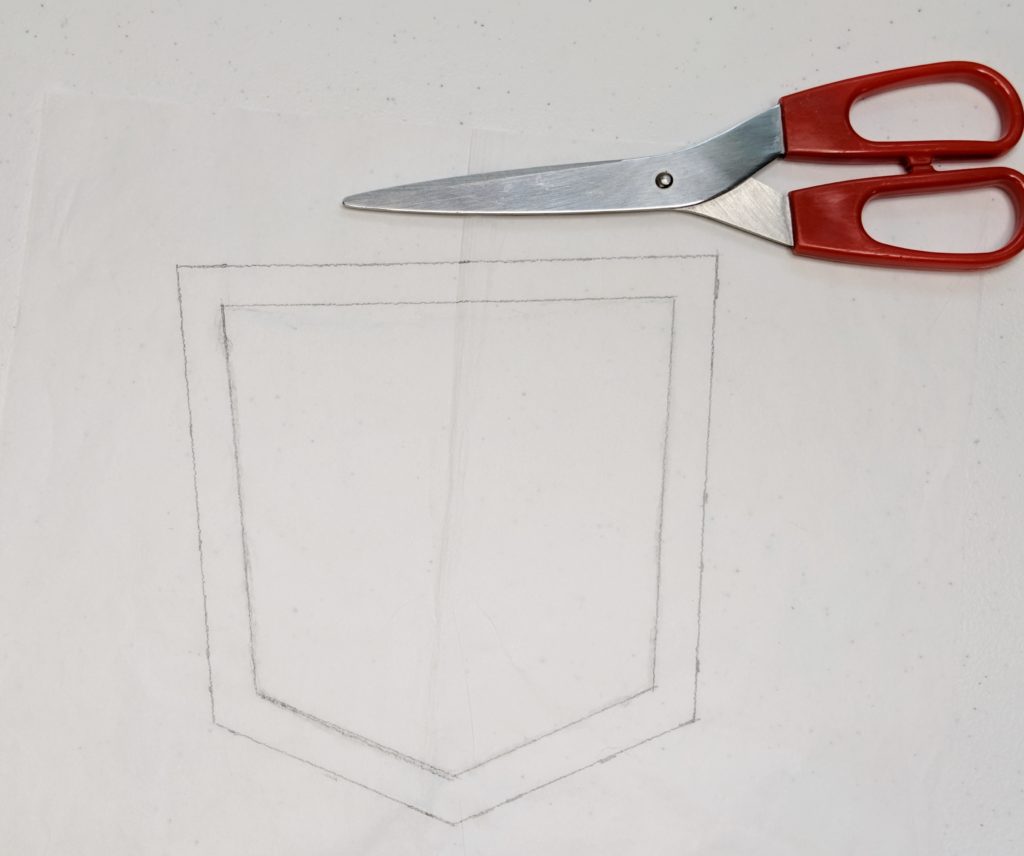
Make sure your grain line is going up and down the pocket piece, not side to side. (See picture)
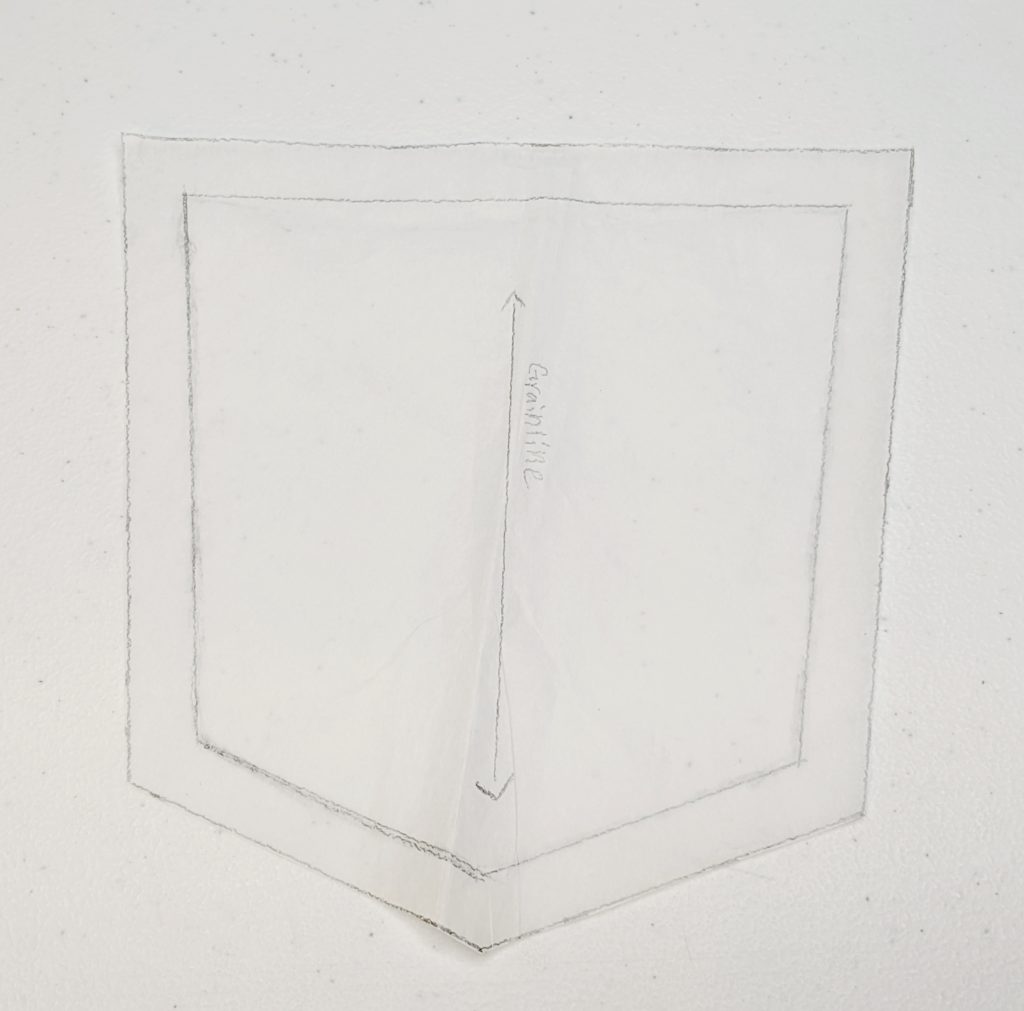
Cut out your fabric using your leggings pattern and the back pocket pattern piece you just made.
Pocket Placement
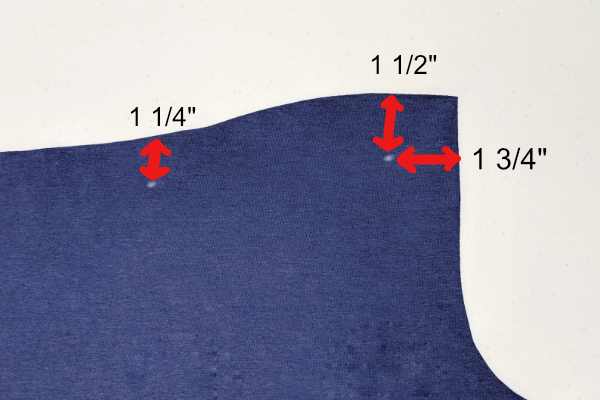
You will want to mark pocket placement before you assemble the pattern. Using a ruler and a marking tool mark 1 ¾” in from the bum seam (The tall side of the leggings,) 1 ½” down from the top closest to the bum seam, and 1 ¼” down from the top for the outside of the pocket. Your actual placement may vary slightly from these measurements based on your size, but this will give you a guideline. You can place the pocket pattern piece on top of your legging fabric to help determine placement. Just remember you want to place for the pocket not the seam allowance of the pocket.
Prep Pocket and Add Details
Assemble the leggings per pattern instructions, but don’t sew on the waistband yet. When you get to that step, take your pocket pieces and iron the tops down ½” (Or the seam allowance chosen.)
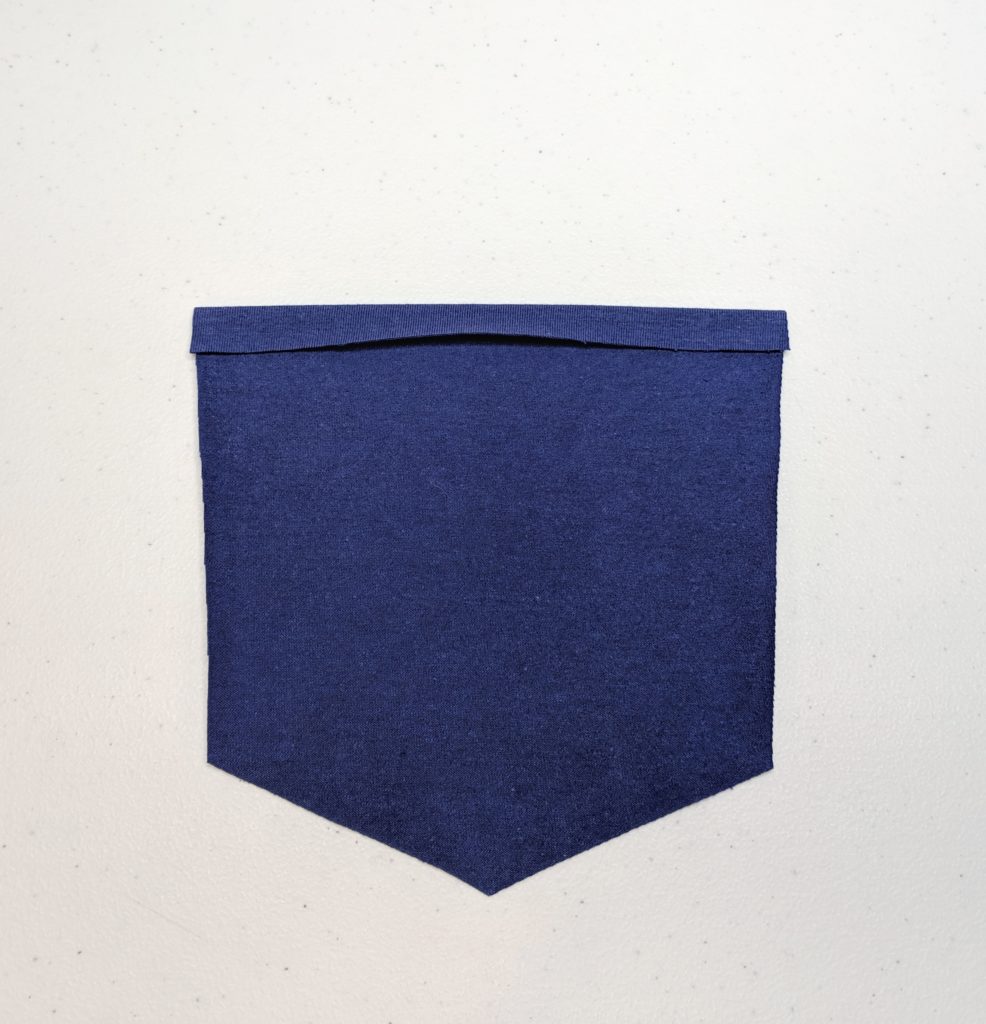
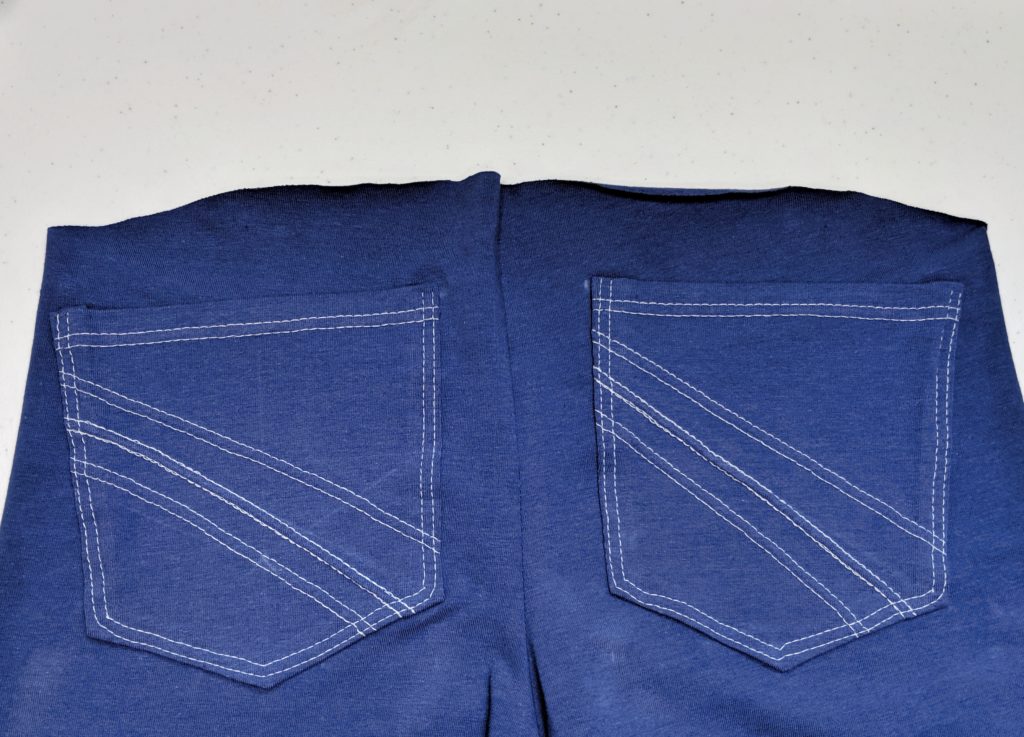
Topstitch in place. You can use a contrasting thread here to give a more decorative look to your pockets.
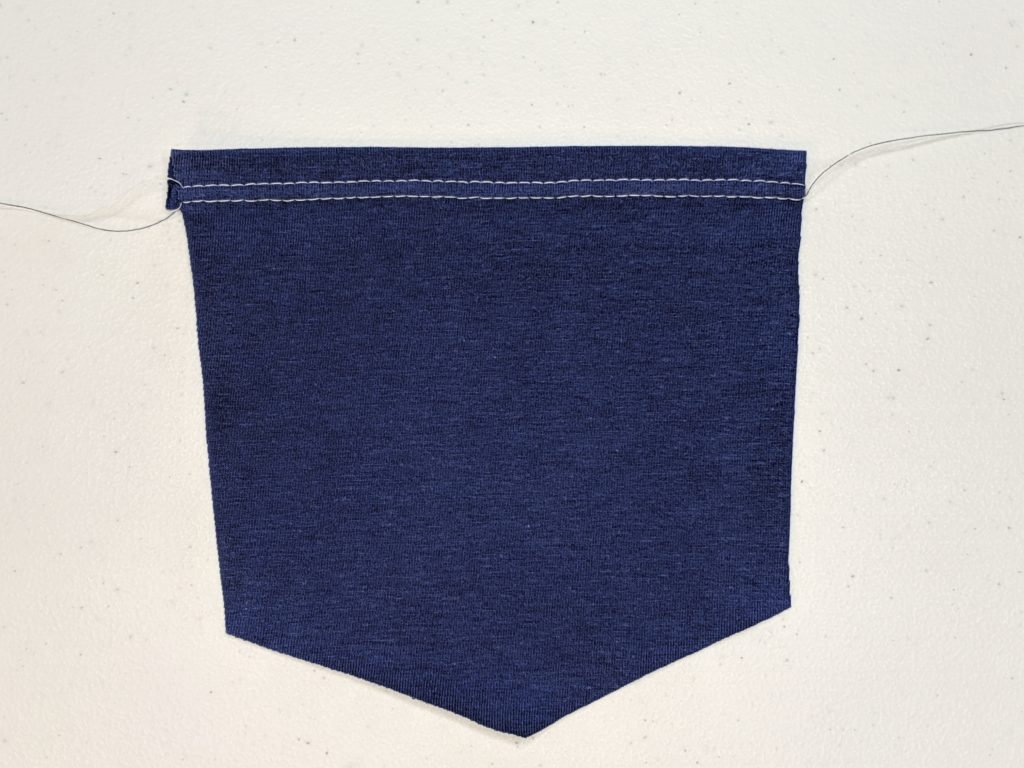
At this point you can add decorative stitching to your pockets for a little personalization. If you are unsure what to do, try looking at some of your ready to wear jeans and see what kind of designs they have on them. That will give you a good idea of what you can add to the pockets.
Iron ½” around the rest of the pocket. (Or the seam allowance chosen.)
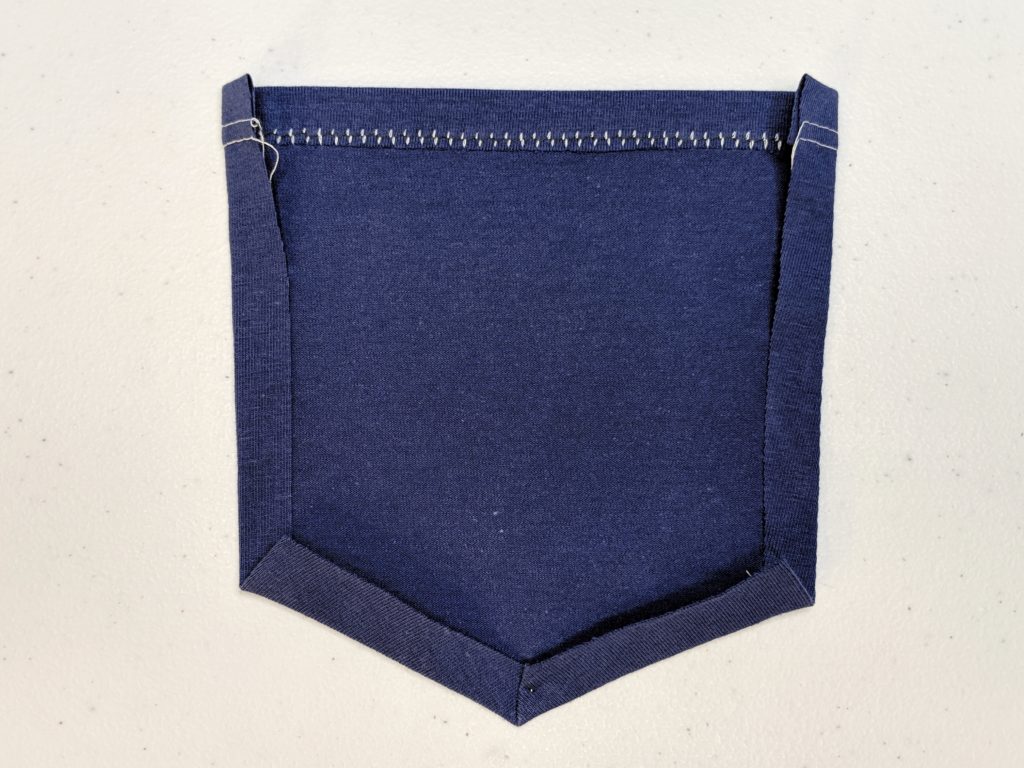
Pin pockets to leggings using the placement marked.
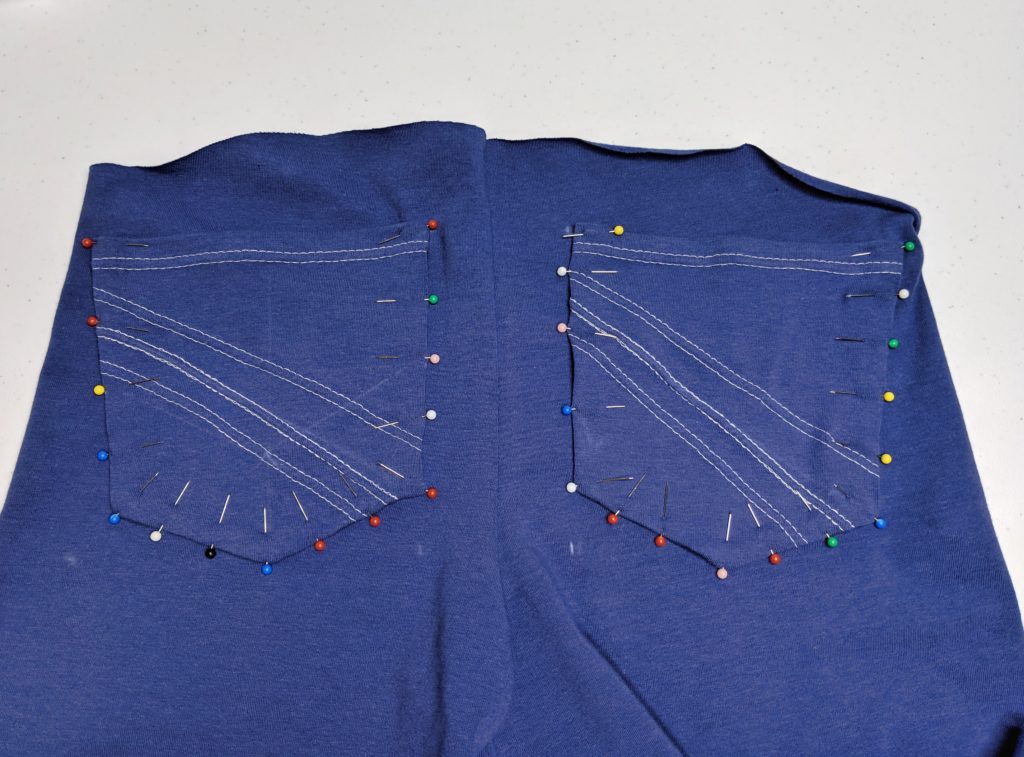
Test Pocket Placement
Baste pockets in place and try on. If you are unsatisfied with pocket placement, pull the basting stitches and re-adjust until you are pleased with the placement.
Once you are satisfied, stitch the pockets onto the leggings.
Secure the Pockets
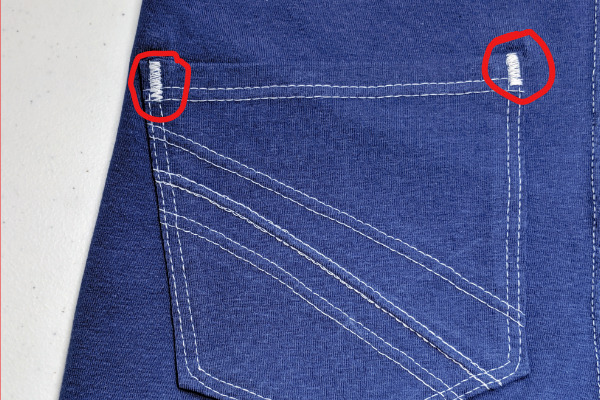
Using a zig-zag stitch, go back over the top section on both sides of each pocket about ½”. This will help secure the pockets and make them more sturdy.
Add the waist band, hem your leggings and you are all done!
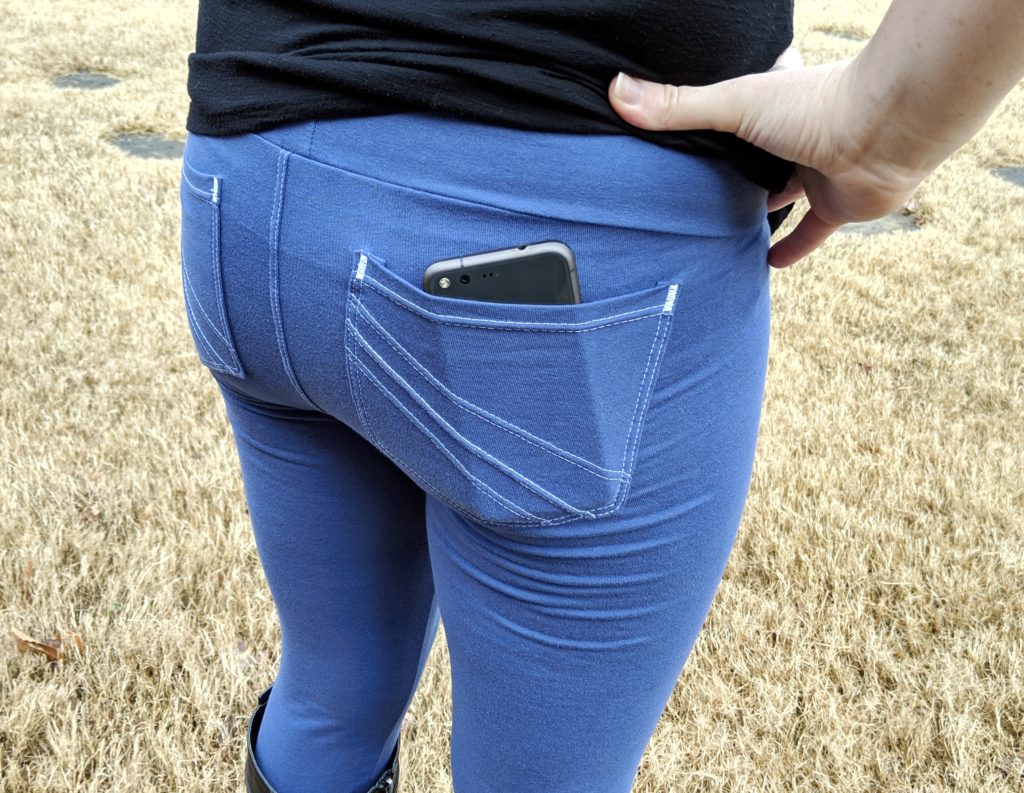
Yay! Now you have a place to keep your phone when you are wearing leggings!
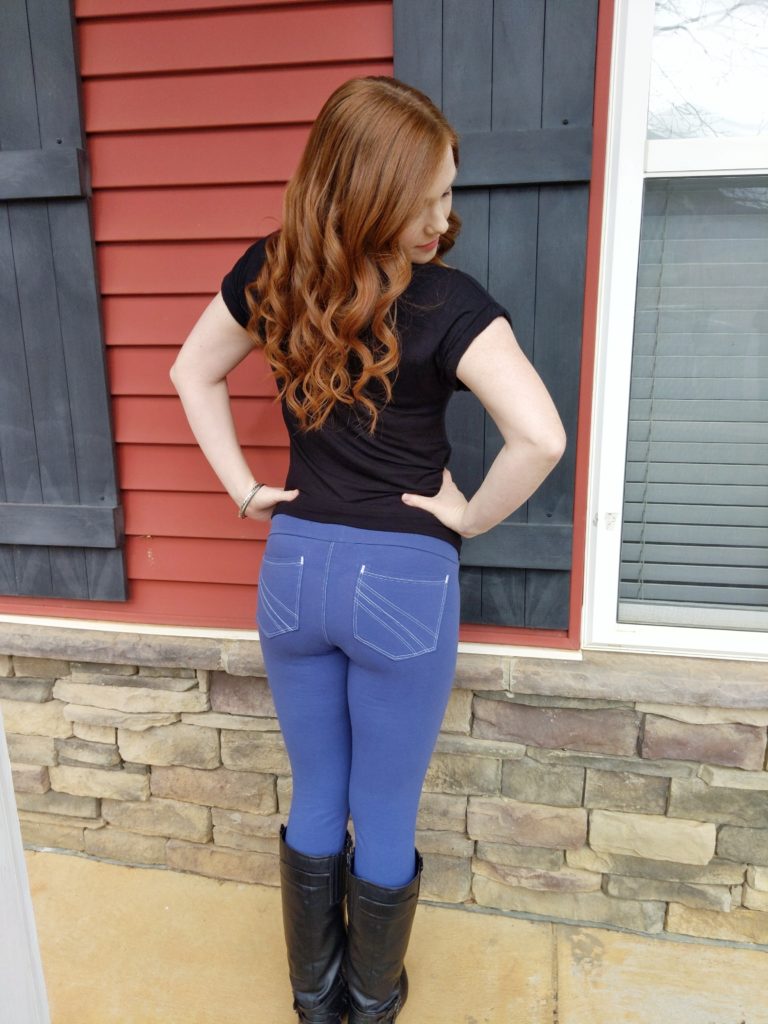
Bonus: By using the same fabric as I did in the tutorial (fabric can be found here), you can get a more “denim” look by top stitching the crotch seam with a twin needle. Press the seam allowance to the wearer’s left and top stitch it down.

Thank you so much for reading! I hope you have found this tutorial useful! <3
